By Erika Heidi
Developer Advocate
Not using Ubuntu 20.04?
Choose a different version or distribution.
Introduction
The LEMP software stack is a group of software that can be used to serve dynamic web pages and web applications written in PHP. This is an acronym that describes a Linux operating system, with an Nginx (pronounced like “Engine-X”) web server. The backend data is stored in the MySQL database and the dynamic processing is handled by PHP.
This guide demonstrates how to install a LEMP stack on an Ubuntu 20.04 server. The Ubuntu operating system takes care of the first requirement. We will describe how to get the rest of the components up and running.
Prerequisites
In order to complete this tutorial, you will need access to an Ubuntu 20.04 server as a regular, non-root sudo user, and a firewall enabled on your server. To set this up, you can follow our initial server setup guide for Ubuntu 20.04.
Step 1 – Installing the Nginx Web Server
In order to display web pages to our site visitors, we are going to employ Nginx, a high-performance web server. We’ll use the apt package manager to obtain this software.
Since this is our first time using apt for this session, start off by updating your server’s package index. Following that, you can use apt install to get Nginx installed:
- sudo apt update
- sudo apt install nginx
When prompted, enter Y to confirm that you want to install Nginx. Once the installation is finished, the Nginx web server will be active and running on your Ubuntu 20.04 server.
If you have the ufw firewall enabled, as recommended in our initial server setup guide, you will need to allow connections to Nginx. Nginx registers a few different UFW application profiles upon installation. To check which UFW profiles are available, run:
- sudo ufw app list
OutputAvailable applications:
  Nginx Full
  Nginx HTTP
  Nginx HTTPS
  OpenSSH
It is recommended that you enable the most restrictive profile that will still allow the traffic you need. Since you haven’t configured SSL for your server in this guide, you will only need to allow regular HTTP traffic on port 80.
Enable this by typing:
- sudo ufw allow 'Nginx HTTP'
You can verify the change by running:
- sudo ufw status
This command’s output will show that HTTP traffic is now allowed:
OutputStatus: active

To                         Action      From
--                         ------      ----
OpenSSH                    ALLOW       Anywhere
Nginx HTTP                 ALLOW       Anywhere
OpenSSH (v6)               ALLOW       Anywhere (v6)
Nginx HTTP (v6)            ALLOW       Anywhere (v6)
With the new firewall rule added, you can test if the server is up and running by accessing your server’s domain name or public IP address in your web browser.
If you do not have a domain name pointed at your server and you do not know your server’s public IP address, you can find it by running the following command:
- ip addr show eth0 | grep inet | awk '{ print $2; }' | sed 's/\/.*$//'
This will print out a few IP addresses. You can try each of them in turn in your web browser.
As an alternative, you can check which IP address is accessible, as viewed from other locations on the internet:
- curl -4 icanhazip.com
Type the address that you receive in your web browser and it will take you to Nginx’s default landing page:
http://server_domain_or_IP
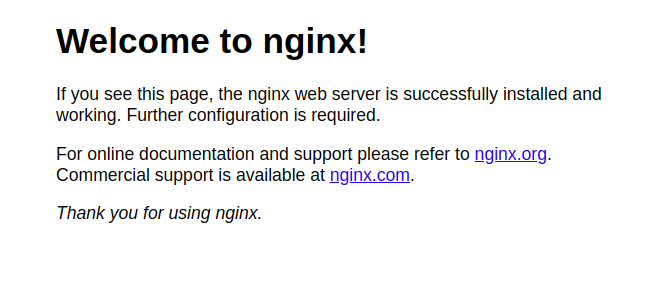
If you see this page, it means you have successfully installed Nginx and enabled HTTP traffic for your web server.
Step 2 — Installing MySQL
Now that you have a web server up and running, you need to install the database system to be able to store and manage data for your site. MySQL is a popular database management system used within PHP environments.
Again, use apt to acquire and install this software:
- sudo apt install mysql-server
When prompted, confirm installation by typing Y, and then ENTER.
When the installation is finished, it’s recommended that you run a security script that comes pre-installed with MySQL. This script will remove some insecure default settings and lock down access to your database system. Start the interactive script by running:
- sudo mysql_secure_installation
This will ask if you want to configure the VALIDATE PASSWORD PLUGIN.
Note: Enabling this feature is something of a judgment call. If enabled, passwords which don’t match the specified criteria will be rejected by MySQL with an error. It is safe to leave validation disabled, but you should always use strong, unique passwords for database credentials.
Answer Y for yes, or anything else to continue without enabling.
VALIDATE PASSWORD PLUGIN can be used to test passwords
and improve security. It checks the strength of password
and allows the users to set only those passwords which are
secure enough. Would you like to setup VALIDATE PASSWORD plugin?

Press y|Y for Yes, any other key for No:
If you answer “yes”, you’ll be asked to select a level of password validation. Keep in mind that if you enter 2 for the strongest level, you will receive errors when attempting to set any password which does not contain numbers, upper and lowercase letters, and special characters, or which is based on common dictionary words.
There are three levels of password validation policy:

LOW    Length >= 8
MEDIUM Length >= 8, numeric, mixed case, and special characters
STRONG Length >= 8, numeric, mixed case, special characters and dictionary              file

Please enter 0 = LOW, 1 = MEDIUM and 2 = STRONG: 1
Regardless of whether you chose to set up the VALIDATE PASSWORD PLUGIN, your server will next ask you to select and confirm a password for the MySQL root user. This is not to be confused with the system root. The database root user is an administrative user with full privileges over the database system. Even though the default authentication method for the MySQL root user dispenses the use of a password, even when one is set, you should define a strong password here as an additional safety measure. We’ll talk about this in a moment.
If you enabled password validation, you’ll be shown the password strength for the root password you just entered and your server will ask if you want to continue with that password. If you are happy with your current password, enter Y for “yes” at the prompt:
Estimated strength of the password: 100
Do you wish to continue with the password provided?(Press y|Y for Yes, any other key for No) : y
For the rest of the questions, press Y and hit the ENTER key at each prompt. This will remove some anonymous users and the test database, disable remote root logins, and load these new rules so that MySQL immediately respects the changes you have made.
When you’re finished, test if you’re able to log in to the MySQL console by typing:
- sudo mysql
This will connect to the MySQL server as the administrative database user root, which is inferred by the use of sudo when running this command. You should see output like this:
OutputWelcome to the MySQL monitor.  Commands end with ; or \g.
Your MySQL connection id is 22
Server version: 8.0.19-0ubuntu5 (Ubuntu)

Copyright (c) 2000, 2020, Oracle and/or its affiliates. All rights reserved.

Oracle is a registered trademark of Oracle Corporation and/or its
affiliates. Other names may be trademarks of their respective
owners.

Type 'help;' or '\h' for help. Type '\c' to clear the current input statement.

mysql>
To exit the MySQL console, type:
- exit
Notice that you didn’t need to provide a password to connect as the root user, even though you have defined one when running the mysql_secure_installation script. That is because the default authentication method for the administrative MySQL user is unix_socket instead of password. Even though this might look like a security concern at first, it makes the database server more secure because the only users allowed to log in as the root MySQL user are the system users with sudo privileges connecting from the console or through an application running with the same privileges. In practical terms, that means you won’t be able to use the administrative database root user to connect from your PHP application. Setting a password for the root MySQL account works as a safeguard, in case the default authentication method is changed from unix_socket to password.
For increased security, it’s best to have dedicated user accounts with less expansive privileges set up for every database, especially if you plan on having multiple databases hosted on your server.
Note: At the time of this writing, the native MySQL PHP library mysqlnd doesn’t support caching_sha2_authentication, the default authentication method for MySQL 8. For that reason, when creating database users for PHP applications on MySQL 8, you’ll need to make sure they’re configured to use mysql_native_password instead. We’ll demonstrate how to do that in Step 6.
Your MySQL server is now installed and secured. Next, we’ll install PHP, the final component in the LEMP stack.
Step 3 – Installing PHP
You have Nginx installed to serve your content and MySQL installed to store and manage your data. Now you can install PHP to process code and generate dynamic content for the web server.
While Apache embeds the PHP interpreter in each request, Nginx requires an external program to handle PHP processing and act as a bridge between the PHP interpreter itself and the web server. This allows for a better overall performance in most PHP-based websites, but it requires additional configuration. You’ll need to install php-fpm, which stands for “PHP fastCGI process manager”, and tell Nginx to pass PHP requests to this software for processing. Additionally, you’ll need php-mysql, a PHP module that allows PHP to communicate with MySQL-based databases. Core PHP packages will automatically be installed as dependencies.
To install the php-fpm and php-mysql packages, run:
- sudo apt install php-fpm php-mysql
When prompted, type Y and ENTER to confirm installation.
You now have your PHP components installed. Next, you’ll configure Nginx to use them.
Step 4 — Configuring Nginx to Use the PHP Processor
When using the Nginx web server, we can create server blocks (similar to virtual hosts in Apache) to encapsulate configuration details and host more than one domain on a single server. In this guide, we’ll use your_domain as an example domain name. To learn more about setting up a domain name with DigitalOcean, see our introduction to DigitalOcean DNS.
On Ubuntu 20.04, Nginx has one server block enabled by default and is configured to serve documents out of a directory at /var/www/html. While this works well for a single site, it can become difficult to manage if you are hosting multiple sites. Instead of modifying /var/www/html, we’ll create a directory structure within /var/www for the your_domain website, leaving /var/www/html in place as the default directory to be served if a client request doesn’t match any other sites.
Create the root web directory for your_domain as follows:
- sudo mkdir /var/www/your_domain
Next, assign ownership of the directory with the $USER environment variable, which will reference your current system user:
- sudo chown -R $USER:$USER /var/www/your_domain
Then, open a new configuration file in Nginx’s sites-available directory using your preferred command-line editor. Here, we’ll use nano:
- sudo nano /etc/nginx/sites-available/your_domain
This will create a new blank file. Paste in the following bare-bones configuration:
server {
    listen 80;
    server_name your_domain www.your_domain;
    root /var/www/your_domain;

    index index.html index.htm index.php;

    location / {
        try_files $uri $uri/ =404;
    }

    location ~ \.php$ {
        include snippets/fastcgi-php.conf;
        fastcgi_pass unix:/var/run/php/php7.4-fpm.sock;
     }

    location ~ /\.ht {
        deny all;
    }

}
Here’s what each of these directives and location blocks do:
listen— Defines what port Nginx will listen on. In this case, it will listen on port80, the default port for HTTP.root— Defines the document root where the files served by this website are stored.index— Defines in which order Nginx will prioritize index files for this website. It is a common practice to listindex.htmlfiles with a higher precedence thanindex.phpfiles to allow for quickly setting up a maintenance landing page in PHP applications. You can adjust these settings to better suit your application needs.server_name— Defines which domain names and/or IP addresses this server block should respond for. Point this directive to your server’s domain name or public IP address.location /— The first location block includes atry_filesdirective, which checks for the existence of files or directories matching a URI request. If Nginx cannot find the appropriate resource, it will return a 404 error.location ~ \.php$— This location block handles the actual PHP processing by pointing Nginx to thefastcgi-php.confconfiguration file and thephp7.4-fpm.sockfile, which declares what socket is associated withphp-fpm.location ~ /\.ht— The last location block deals with.htaccessfiles, which Nginx does not process. By adding thedeny alldirective, if any.htaccessfiles happen to find their way into the document root ,they will not be served to visitors.
When you’re done editing, save and close the file. If you’re using nano, you can do so by typing CTRL+X and then y and ENTER to confirm.
Activate your configuration by linking to the config file from Nginx’s sites-enabled directory:
- sudo ln -s /etc/nginx/sites-available/your_domain /etc/nginx/sites-enabled/
Then, unlink the default configuration file from the /sites-enabled/ directory:
- sudo unlink /etc/nginx/sites-enabled/default
Note: If you ever need to restore the default configuration, you can do so by recreating the symbolic link, like this:
- sudo ln -s /etc/nginx/sites-available/default /etc/nginx/sites-enabled/
This will tell Nginx to use the configuration next time it is reloaded. You can test your configuration for syntax errors by typing:
- sudo nginx -t
If any errors are reported, go back to your configuration file to review its contents before continuing.
When you are ready, reload Nginx to apply the changes:
- sudo systemctl reload nginx
Your new website is now active, but the web root /var/www/your_domain is still empty. Create an index.html file in that location so that we can test that your new server block works as expected:
- nano /var/www/your_domain/index.html
Include the following content in this file:
<html>
  <head>
    <title>your_domain website</title>
  </head>
  <body>
    <h1>Hello World!</h1>

    <p>This is the landing page of <strong>your_domain</strong>.</p>
  </body>
</html>
Now go to your browser and access your server’s domain name or IP address, as listed within the server_name directive in your server block configuration file:
http://server_domain_or_IP
You’ll see a page like this:
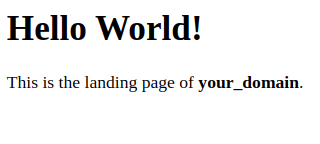
If you see this page, it means your Nginx server block is working as expected.
You can leave this file in place as a temporary landing page for your application until you set up an index.php file to replace it. Once you do that, remember to remove or rename the index.html file from your document root, as it would take precedence over an index.php file by default.
Your LEMP stack is now fully configured. In the next step, we’ll create a PHP script to test that Nginx is in fact able to handle .php files within your newly configured website.
Step 5 –Testing PHP with Nginx
Your LEMP stack should now be completely set up. You can test it to validate that Nginx can correctly hand .php files off to your PHP processor.
You can do this by creating a test PHP file in your document root. Open a new file called info.php within your document root in your text editor:
- nano /var/www/your_domain/info.php
Type or paste the following lines into the new file. This is valid PHP code that will return information about your server:
<?php
phpinfo();
When you are finished, save and close the file by typing CTRL+X and then y and ENTER to confirm.
You can now access this page in your web browser by visiting the domain name or public IP address you’ve set up in your Nginx configuration file, followed by /info.php:
http://server_domain_or_IP/info.php
You will see a web page containing detailed information about your server:
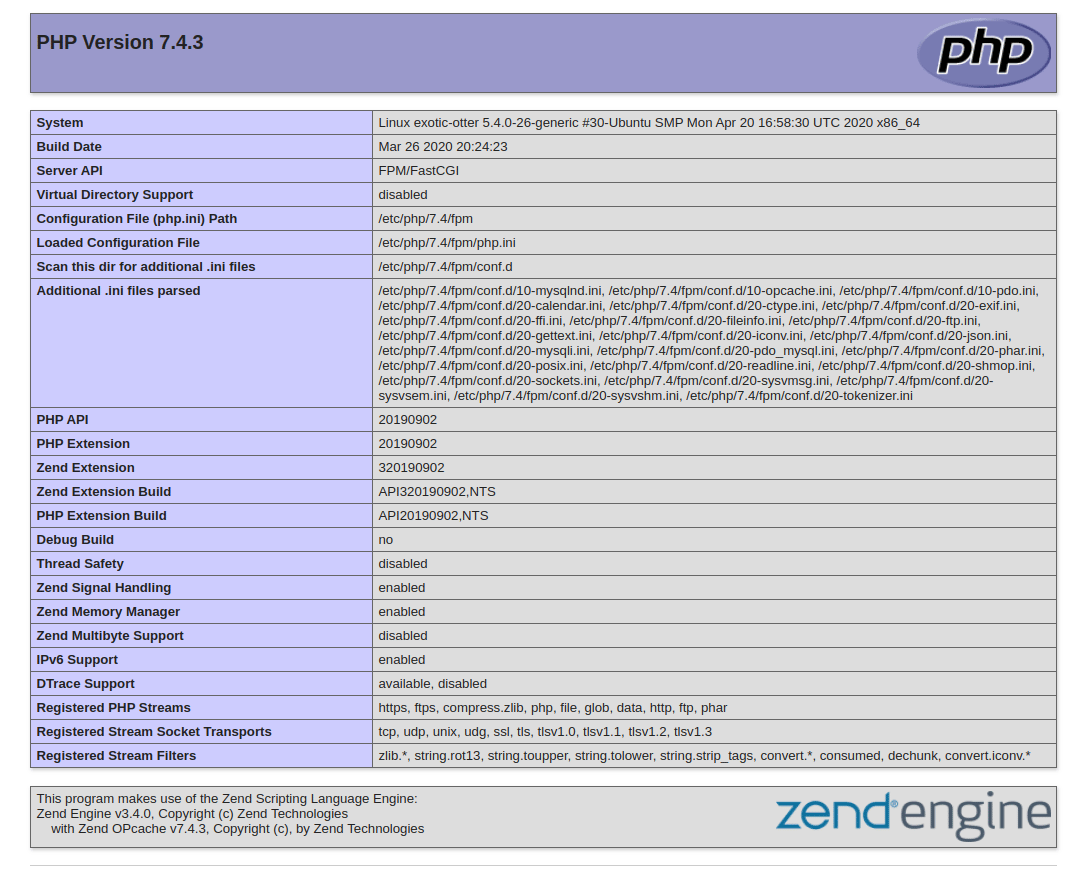
After checking the relevant information about your PHP server through that page, it’s best to remove the file you created as it contains sensitive information about your PHP environment and your Ubuntu server. You can use rm to remove that file:
- sudo rm /var/www/your_domain/info.php
You can always regenerate this file if you need it later.
Step 6 — Testing Database Connection from PHP (Optional)
If you want to test whether PHP is able to connect to MySQL and execute database queries, you can create a test table with dummy data and query for its contents from a PHP script. Before we can do that, we need to create a test database and a new MySQL user properly configured to access it.
At the time of this writing, the native MySQL PHP library mysqlnd doesn’t support caching_sha2_authentication, the default authentication method for MySQL 8. We’ll need to create a new user with the mysql_native_password authentication method in order to be able to connect to the MySQL database from PHP.
We’ll create a database named example_database and a user named example_user, but you can replace these names with different values.
First, connect to the MySQL console using the root account:
- sudo mysql
To create a new database, run the following command from your MySQL console:
- CREATE DATABASE example_database;
Now you can create a new user and grant them full privileges on the custom database you’ve just created.
The following command creates a new user named example_user, using mysql_native_password as default authentication method. We’re defining this user’s password as password, but you should replace this value with a secure password of your own choosing.
- CREATE USER 'example_user'@'%' IDENTIFIED WITH mysql_native_password BY 'password';
Now we need to give this user permission over the example_database database:
- GRANT ALL ON example_database.* TO 'example_user'@'%';
This will give the example_user user full privileges over the example_database database, while preventing this user from creating or modifying other databases on your server.
Now exit the MySQL shell with:
- exit
You can test if the new user has the proper permissions by logging in to the MySQL console again, this time using the custom user credentials:
- mysql -u example_user -p
Notice the -p flag in this command, which will prompt you for the password used when creating the example_user user. After logging in to the MySQL console, confirm that you have access to the example_database database:
- SHOW DATABASES;
This will give you the following output:
Output+--------------------+
| Database           |
+--------------------+
| example_database   |
| information_schema |
+--------------------+
2 rows in set (0.000 sec)
Next, we’ll create a test table named todo_list. From the MySQL console, run the following statement:
- CREATE TABLE example_database.todo_list (
- item_id INT AUTO_INCREMENT,
- content VARCHAR(255),
- PRIMARY KEY(item_id)
- );
Insert a few rows of content in the test table. You might want to repeat the next command a few times, using different values:
- INSERT INTO example_database.todo_list (content) VALUES ("My first important item");
To confirm that the data was successfully saved to your table, run:
- SELECT * FROM example_database.todo_list;
You’ll see the following output:
Output+---------+--------------------------+
| item_id | content                  |
+---------+--------------------------+
|       1 | My first important item  |
|       2 | My second important item |
|       3 | My third important item  |
|       4 | and this one more thing  |
+---------+--------------------------+
4 rows in set (0.000 sec)
After confirming that you have valid data in your test table, you can exit the MySQL console:
- exit
Now you can create the PHP script that will connect to MySQL and query for your content. Create a new PHP file in your custom web root directory using your preferred editor. We’ll use nano for that:
- nano /var/www/your_domain/todo_list.php
The following PHP script connects to the MySQL database and queries for the content of the todo_list table, exhibiting the results in a list. If there’s a problem with the database connection, it will throw an exception.
Copy this content into your todo_list.php script:
<?php
$user = "example_user";
$password = "password";
$database = "example_database";
$table = "todo_list";

try {
  $db = new PDO("mysql:host=localhost;dbname=$database", $user, $password);
  echo "<h2>TODO</h2><ol>";
  foreach($db->query("SELECT content FROM $table") as $row) {
    echo "<li>" . $row['content'] . "</li>";
  }
  echo "</ol>";
} catch (PDOException $e) {
    print "Error!: " . $e->getMessage() . "<br/>";
    die();
}
Save and close the file when you’re done editing.
You can now access this page in your web browser by visiting the domain name or public IP address configured for your website, followed by /todo_list.php:
http://server_domain_or_IP/todo_list.php
You should see a page like this, showing the content you’ve inserted in your test table:

That means your PHP environment is ready to connect and interact with your MySQL server.
Conclusion
In this guide, we’ve built a flexible foundation for serving PHP websites and applications to your visitors, using Nginx as web server and MySQL as database system.
Thanks for learning with the DigitalOcean Community. Check out our offerings for compute, storage, networking, and managed databases.
About the author
Dev/Ops passionate about open source, PHP, and Linux. Former Senior Technical Writer at DigitalOcean. Areas of expertise include LAMP Stack, Ubuntu, Debian 11, Linux, Ansible, and more.
Still looking for an answer?
 This work is licensed under a Creative Commons Attribution-NonCommercial- ShareAlike 4.0 International License.
Become a contributor for community
Get paid to write technical tutorials and select a tech-focused charity to receive a matching donation.

DigitalOcean Documentation
Full documentation for every DigitalOcean product.

Resources for startups and AI-native businesses
The Wave has everything you need to know about building a business, from raising funding to marketing your product.
The developer cloud
Scale up as you grow — whether you're running one virtual machine or ten thousand.

Start building today
From GPU-powered inference and Kubernetes to managed databases and storage, get everything you need to build, scale, and deploy intelligent applications.